Showing posts with label photography. Show all posts

8.12.2015

a starry summer night


it was the second to last night we spent in the states this summer, our last night at Husband's childhood home. shooting the night sky from his yard had been on my to-do list for years but I had never quite managed it.

we came home late from a friend's house, exhausted and emotionally charged, knowing that the next day was our last before traveling back to Taiwan. we got out of the car and happened to look up before heading inside. a moonless sky glittered with stars above us.


it was just after midnight and we had a full day ahead of us. but it was one of those moments where you know you'll regret not staying up more than you'll regret the lack of sleep.

I ran inside for my camera and a tripod. I hadn't adjusted my settings ahead of time but after some trial and error I found my way. I still think there's room for improvement on my night photography skills, but this went worlds better than my first attempt in New Zealand.


we played around with silhouettes and framing the sky in trees until my battery died. and then my other battery died. I was a little disappointed... but it was after 2am and sleep sounded pretty amazing. we went inside and crashed, and were [of course] tired the next day.

but I still think it was worth it.


[and for those interested in the setting used: most of these photos were shot at ISO 800 or 1600, between 6 and 15 seconds exposure, with a 22mm lens set at f2]

3.09.2015

Mt Cook // the New Zealand night sky


one thing that was on my "must-do" list for our travels to New Zealand was to photograph the night sky. in Taiwan, at least in the city with all the light pollution [and other pollution] we don't get a lot of night sky visibility. and New Zealand is kindof famous for its starry views.

between jet lag, weather, and the fact that it stays light out past 9pm during NZ summers, my first opportunity to really see the stars was the night we camped in Lake Tekapo. it was still partially cloudy but the stars were shining bright. but this was the middle of the night when I had ventured out of our tent in search of the rest room, and I decided that waking Husband up to get the car keys and then digging through the trunk to find my tripod and trying to remember settings was a bit much for 3am.

the next night we were camping again, this time at Mt. Cook. I made sure to leave my camera gear accessible, look up settings ahead of time, staked out a few locations, and was really excited about the thought of shooting Mt Cook with a backdrop of stars.


the one thing I hadn't anticipated was the moon. it was full, and it was bright. most tutorials out there recommend shooting when there is no moon, and getting away from as much interfering light as possible. I'm going to let you know the settings that worked best for me in this situation, but please know that these were not ideal conditions [and these setting would definitely not get great results on a moonless night.] I set up to take my first shot and, well...


this photo was taken at ISO 800, f2, 15 second exposure. which should have been decent for trying to shoot the stars at night, but obviously not what was going to work for me. I swear, this was taken at 11pm and not in daylight. the moon was just that bright. it doesn't have any editing whatsoever. [the rest of the photos in this post have some editing to try boosting what you can see of the stars.]


after some adjustments I was able to get a sprinkling of stars to show up. not the blazing constellations or misty galaxies I'd hoped for... but I decided to just let the moon do its thing and use this as a practice shoot. [I was hoping that we would have some clear weather later in our trip... which didn't happen.] I found I was able to shoot at ISO 100 and by using my 22mm lens with the aperture fully open at f2, a 15 second exposure seemed to get the best results.


Husband was actually having some fun doing this with me. we experimented with exposures up to 3 minutes [as shown above.] the star trails started showing up around 30 seconds, and anything less than 15 seconds was hard to get much starlight.


I was using my tripod and remote to shoot. it took some trial and error to get the positioning right, but I think I like the shots with a little landscape in the foreground best. the photo immediately above was the view from our tent. I tried hiding the moon behind the tree to get a little more star detail, but the moon's reflection off the mountains and glaciers and lakes was pretty tough to combat.


I'm a bit disappointed that the moon [and later in the trip, the weather] kept me from getting the epic sky shots I was hoping for. but I'm glad I was able to come home with something. honestly, I can't be too mad because one: I had a lot of fun shooting these photos and two: I got to see the night sky in New Zealand. hopefully I have a chance to try my hand at astrophotography again under better conditions - other than shooting the blood moon eclipse [also less than ideal] this was my first attempt.

have you ever tried to shoot the stars? do you have any tips for my next attempt?

2.02.2015

my favorite photography gear


"what camera do you use?" is probably the question I get asked most in comments and emails. I've finally put together this post [with pictures of my gear of course] to try and answer that question. bear in mind that every person has different preferences, and my choices have been heavily influenced by the fact that most of my photography is travel related. therefore, the gear I use most is compact and lightweight.


Canon EOS M

this mirrorless camera has become my go-to for travel photography. it's compact and lightweight, and doesn't draw attention from potential thieves like a large, expensive DSLR might. the model I purchased in March 2013 came with a 22mm f2 lens, which I use for the majority of my photos. I also have the adaptor which will allow you to connect any Canon EF compatible lens.

one of my favorite features of this camera is the rear touchscreen. it features a live preview of what your shot will look like given the current settings. it makes using manual a no-brainer when I can see just how much brighter my photo will be by opening up the aperture one fstop, or bumping up the ISO. the EOS M offers all the same manual and partial modes as a DSLR [M, Av, Tv...] but also includes the "creative filter" modes that Canon uses for their point-and-shoots.

this camera [or any mirrorless system] is perfect for someone looking to upgrade from a point-and-shoot but not wanting to commit to a full DSLR, anyone who wants to start learning manual settings, or the traveler who doesn't want to be weighed down by their gear. currently, Canon has all but stopped selling the EOS M in the US market. there is speculation that they will be releasing an updated mirrorless system this year, but until then you can still find the M in Europe, Asia, and on Amazon.


Canon EOS Rebel Xsi

this camera was my very first DSLR, purchased in 2009. though my EOS M has a higher megapixel count [18 on the M, 12.2 on the Xsi], this camera still creates beautiful images. one of the best investments I made was to purchase two lenses for this camera body - having quality glass really makes a difference in your images. first, I upgraded from the included kit lens to a Sigma 17-50mm f2.8 zoom lens. this was a more affordable option than the nearest Canon equivalent, and I have had no complaints. second is my beloved Canon 50mm f1.8 lens. at less than a hundred dollars, this lens is probably the most bang for your buck you can get. I used this lens religiously when shooting for my food blog, and continue to use it today with both my Rebel and my M.

I've used several neck straps with this camera, but as pictured above, I have equipped it with a CIESTA leather handstrap. is it a little less safe? maybe. but I was tired of getting myself tangled in the neck strap every time I wanted to pull my camera out of my bag [or put it back in.] for days when I plan to be shooting all day, I still use the neck strap to take some stress off my hand.

Canon continues to roll out Rebel DSLRs, the latest of which is the T5i model. if you are interested in a DSLR, my advice would be to buy the basic camera body and spend the extra money on lens upgrades. while a DSLR and zoom lens combination can be bulky and heavy for travel, there is something to be said for the feel of a good, solid camera in your hands. I don't use my Rebel often anymore but I doubt I'll ever get rid of it.


Instax mini 25

I purchased this quirky instant camera in 2012, with the intent of using it for a 52 weeks project [which I completed in 2013.] I had never had experience with instant film before, but using this camera is so. much. fun. I love having physical keepsakes from my travels, and the small credit-card sized photos come in a variety of film colors and designs.

there is a bit of a learning curve, and things never turn out just perfect with instant film. but I use this camera mostly for the fun. I have an entire wall in my apartment covered in instax memories, and it just makes me smile whenever I look at it. the film runs between $8 to $10 US per pack of 10 exposures, depending if you are buying plain white or rainbow colored or Hello Kitty themed. it's not always the most practical thing in my camera bag, but I love my instax anyway.


iPhone 5c

phone cameras have come a long way. I've always used my phone for instagramming, but since upgrading to the iPhone 5c in 2014 I have taken so many I even started a "travel by iPhone" series. sometimes, you don't want to carry around a bulky camera. sometimes, you don't want to be obvious you are taking a photo. using your cell phone can be the perfect solution. [although mine is hot pink and currently equipped with a Cheshire Cat case I got at Tokyo Disney, so not really very subtle.]

one item that is not pictured here but has been handy in the past is a lifeproof phone case. I had one for my old iPhone 4 and it was perfect for beaches, inclement weather, and clumsy Jamies. I found the case obscured the camera lens a bit and the photos were not as clear, but I'm hoping to pick up a newer model of the case soon and that they will have improved that issue.


assorted gadgets

as you probably noticed above, I recently bought a selfie stick. I have not had much chance to play with it, but you can bet there will be some epic shots coming soon from New Zealand. the bundle I purchased also came with a muku labs shuttr phone remote - no need to rely on the self timer.

I also have a remote that works with both my EOS M and Rebel Xsi. I purchased this 
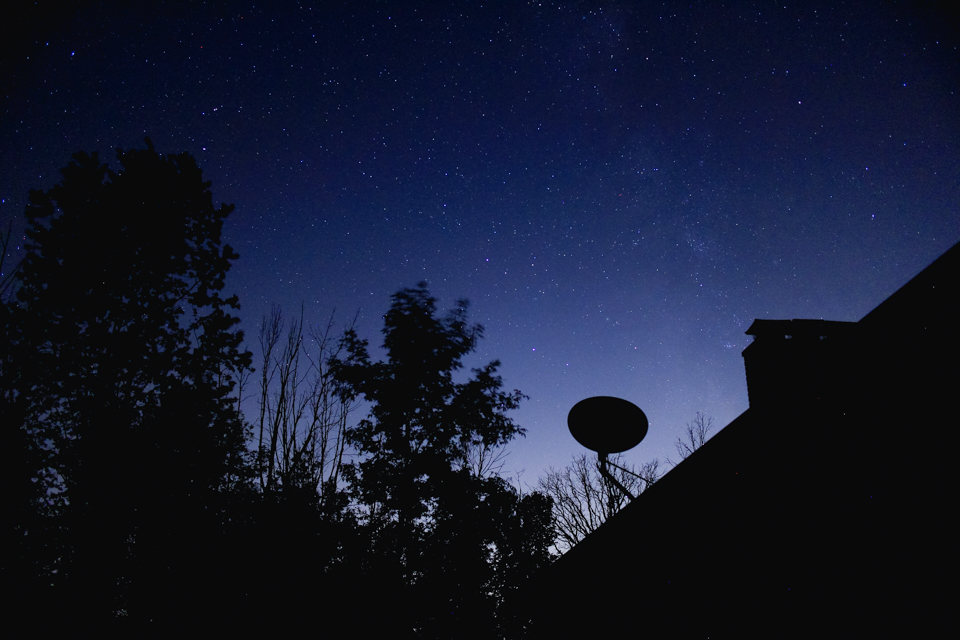
Canon RC-1 back in 2010, and in combination with my tripod [not pictured here] it has been key for self-portraits, low light shots, and of course the blood moon eclipse. not pictured is a full-size Olympus tripod that I picked up for around $30 US. some days I wish it was a little taller, but it's sturdy and gets the job done.

the strange green gadget is a gorillapod. it's a mini tripod with fully flexible and bendable legs that allow you to situate your camera just about anywhere. I originally purchased this in 2009 to work with my old point-and-shoot, but the EOS M is light enough to work with this model. [they also sell a sturdier version intended for DSLR use.]


my brain

ok, hear me out. my philosophy on photography is that the photographer creates the image, not the equipment. and therefore, my brain [or maybe my "eye"] is the most important gear I have. the good news is that you don't have to spend thousands of dollars to create beautiful images. the bad news is that you actually have to practice and work at developing your photography. quality gear can help, but only to a point. you [and you brain] will have to put some effort in to improve.

and now I will shamelessly plug that I'm planning to post a series of photography tutorials over the next few months. so hopefully all our photography will be improving - mine by the practice and the creating, yours by the reading and the trying. if you are interested in learning something specific, I'd love to hear about it in the comments below.

what is your go-to camera? do you have any photography questions you'd like me to answer in a future post?

8.28.2014

create your own stock photo library


as bloggers, we've all been there: you've written a post but don't have a relevant image to include. you could hit "publish" as is... but you know that the physics of the internet make it practically impossible not to include a picture in your post. having a quick shoot is out because it's likely raining or 2am or your camera battery isn't charged or you're just feeling lazy. so what do you do?

many bloggers, big and small, use stock images in their posts... but I don't. the ins and outs of properly using and crediting these images can get tricky, and I just like the idea of having all my content being unique to me and my personal style. it's true that I'm a bit of a photography nerd, but you don't have to be a camera wizard to shoot great stock photos to use for your own blog. follow these six tips below, and soon you'll have a folder full of pretty and unique images to use on your blog.


use what you have

don't own a DSLR? no problem. you can take great photos with whatever camera you have. [let's be real, your iPhone has a better camera than most professionals 10 years ago.] stock photos can be shot anywhere in your house or outdoors where you have natural light. think of what types of images you want to have, then create them. go for a walk, get some props, stage a scene. wood floors, brick walls, grass, even construction paper make great backgrounds. seriously, you don't need to go buy fancy things. but for the love of cheese, TURN OFF YOUR FLASH.

create simple, clean images

stock photos are typically used when you want to include an image in your post, but the image itself is not the star. this doesn't mean your photos can't have your personal style. add your favorite coffee mug, houseplant, or journal to the shot. just be sure clear away distracting background clutter. I like to shoot photos in my office because I love the contrast between my chalkboard wall and my bright red desk. but my desk is rarely clean and my chalk wall is typically covered in lists and doodles. shoving papers to the side and a few swipes to erase the wall make a world of difference!


take a variety of shots

having a library of photos that complement the mood and theme of your blog will allow you to easily drop one in where needed, without boring your readers with the same image over and over. I have a single stock photo I use regularly for my writer's block series, but I wouldn't use the same image in a different type of post. that would probably get confusing! I have used the same photo more than once, but I try to space out their usage and vary the kinds of photos in consecutive posts. shooting similar photos in a "series" will also allow you to include more than one in a post [like I did here.]

save the original file

I'm going to say it again, because this one is really important: save the original file. having the full-size, unedited and uncropped photo enables you to go back to square one at any time. you can use the same photo in a variety of ways - square or landscape, vintage-y or black and white, with text or without. the look and feel of your blog changes over time, and keeping an unedited file means you can update it and use it again in the future.


think about text placement

on some photos, make sure that you leave space with a semi-solid light or dark background where you can place contrasting text. one of the main reasons you want to include an image with your blog post is so that people can pin it to their Pinterest boards, right? when using a generic photo, adding text to describe your post can seriously boost the number of clicks your pin gets. [think about it: a photo of flowers or a cup of coffee on it's own may get repined, but over time people will change the description and not realize it links to your awesome post. but if you add the description to the image? people will know that the pin is linking back to something useful!] if you shoot your photos with this in mind, it will save you trouble when trying to edit and add text later.

browse your existing photos

you probably have hundreds of photos sitting on your phone or computer already that could be used in place of a stock photo. I shot new photos for this post, but I have an entire folder of "blank" photos that I can reference. every few months I scroll through my library to add to this folder and keep things fresh. I find that a lot of photos that aren't interesting or exciting enough to include in a travel post make great stock photos - blurred shots, nature details, faceless portraits, etc. and of course we all know that coffee mugs and laptops are blogger kryptonite!


do you use stock photos or shoot your own? what tips would you have to add?

linking up with Nicole for treat yo self Thursday

2.26.2014

some thoughts + a walk in the park


well, hello there. how about a list?

1. the other day I decided to wander around our local park and shoot some self portraits. you see, I had really been hoping to get some good pictures of myself while we were in Bali. but it turns out that I have had the autofocus turned off since the photo workshop I went to in September. [yeah, uh, oops.] and so any time I handed my camera to someone it came out wrong. I also was shooting in full manual- the first vacation I've ever done so. but the weather was changing so quickly between clouds and sun, and it was so hard to tell on the back display what was going on, I ended up overexposing a lot of my photos. [not that anyone but me really notices or cares, but still.]

so things being as they are, I spent a few hours with my tripod and remote wandering the park. which isn't really a bad thing. time spent outside, practicing something I enjoy, and of course being pleased with the results. and strangely I did not get as many gaping stares as I thought I would.

sometimes I feel awkward shooting self-portraits, but also about posting them. but it just seems like the natural blogger thing to do, right?


2. everyone has been talking about modern calligraphy. including me. I had a book with calligraphy markers when I was in middle school - but I'm interested in something more advanced and a little more modern. I had dreams of signing up for this skillshare class... Melyssa and Beka and Amanda even gave me advice on where to get supplies. I went out searching and found not quite what I need here [but there were a TON of brush calligraphy supplies.] I'm still curious to try taking it up again one day, but for now I think I should be focusing on writing my book and playing with my current 87 hobbies... and maybe pick up supplies while I'm in the States later this year.


3. a few weeks ago Husband and I got real phones again. and by real I mean of course iPhones because our previous phone situation was a shared pay-as-you-go old school Nokia which required 10 minutes and 3 tries to successfully send a text message.

I know I can live without a smartphone, but having one makes life so much easier. like when you are driving around on your scooter and are trying to find your way somewhere you can use the maps. or when Husband is buying food and wants to look up a brand to make sure I'm not allergic to it. or for this novel thing called phone calls in which you can talk to said Husband from anywhere instead of worrying and feeling the need to stay close to the apartment and internet [and thus Facebook since that is otherwise your main form of communication.]

I still forget my phone is real sometimes, especially since I used to carry our service-less old iPhone around to snap photos and Instagram whenever I could find some wifi. but I'm ok with not being completely connected at all times.


4. in related news, I'm becoming obsessed with an app called duolingo. it's this amazing language learning tool disguised as a game. you lose hearts for wrong answers, and get xp points and level up as you practice. [sounds like Pokemon, now that I think about it.] right now Husband and I are brushing up on Spanish, but they have several languages to choose from and are developing even more. the best part is - it's free. and you can use it on your computer, phone, or tablet.

the second best part? I spent 5 minutes today practicing phrases I would actually use such as "I drink wine"/ "Yo bebo vino." and "I am writing a book" / "Yo escribo un libro."


5. a few housekeeping items, or more like blogkeeping items: you may have noticed I've tweaked my design a bit and you can now find links to my new facebook page and google plus on the sidebar. I realize what I am supposed to say here is "like my page!" and "add me to your circles!" but honestly, different kinds of readers like to follow in different ways - I won't be offended if you choose to keep on what you're doing and ignore that.

for anyone who had signed up for email subscriptions and is wondering why they stopped but now are again showing up in your mailbox? well, thanks to some investigation on feedburner and some verification from my mother [thanks, Mom!] the problem has been solved. carry on.

I've also opened up a new sponsorship option called the traveling novelist. this includes a large sidebar ad and the opportunity for you to write a guest post on ink + adventure. handing my blog over to someone else does make me a little bit nervous. but I hope it will help introduce you to some lovely people while I'm busy entertaining visitors and hopping around the globe these next few months. if you're interested in being one of those lovely people, the first 3 to book will get 30% off with the code: WRITEMEUP.

phew. and I think that about covers it. hope you're all having a wonderful week!

1.28.2014

52 weeks project recap


since we are almost to the end January, I figured I better share the results of my 2013 52 weeks project with you:

I made it through all 52 weeks! and I actually ended up with 53 photos... I'll explain why in a minute.


the simple twine + mini clothespin display I started last January has finally filled up! if you remember, I hung the twine using tiny 3M sticky hooks. I added a few more strands as the year went on.

for a while, I was hanging all of my instax photos here... but I've moved the extra photos elsewhere in the apartment for now.


41// Guang Fu Road
42// dragon archway
43// one of my park writing spots
44// red door + lion knocker
45// plum blossom pavillon
46// the gardens by our lake
47// a striped selfie


48// dragons + power lines
49// roadway gate [more dragons]
50// the egg sculpture
51// Big City Christmas tree
52a// New Year's on the roof - me
52b// New Year's on the roof - Husband


that's right... week 52 has 2 photos. I actually thought I had completed the project, but on December 31st I realized [just in time] that I needed one more. Husband had just come home from school and the sun was setting, so we ran up to the roof to catch the last of the light. there were 2 exposures left on my camera. it only seemed right that we should each have an "end of 2013" photo.


I love this wall so much... every time I see it, I smile. 2013 was an amazing year, and I'm so lucky I can reflect on those memories every day just by walking into my office.

not every picture turned out perfect, and I learned a lot about working with instant film. I definitely think I would attempt this again as another 52 weeks project. but for now, my instax camera will just be for fun.

this year I've decided to tackle a weekly self-portrait. [all of your comments about self-portraits made me really want to try it again!] I may not be sharing them all on the blog, or even telling you that they are part of my project when I post them... but they'll be there. [hint: check out the last photo!]

have you ever done a photo project? are you working on one this year?

see the rest of my 52 weeks posts here:
Related Posts Plugin for WordPress, Blogger...